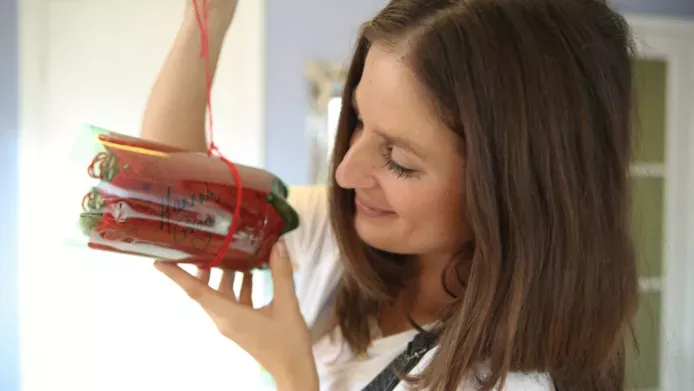
Join Hannah Grows in this step-by-step guide.
A house for solitary bees can be made out of recycled materials and placed anywhere, no matter where you live in the city or country.
Here are two ways to create a homemade a bee house.
House 1
Safety first: Adult supervision may be required
Preparation time: 15 minutes
Cost: Less than £5
Materials:
- Waterproof container – such as a plastic bottle or juice carton – or length of plastic piping
- Scissors
- Warm fabric – such as an old jumper, cardboard or wool
- Enough hollow tubes to fill the container – such as dry cow parsley stems, paper straws, bamboo canes (aim for each to be 15 cm long)
- Air-drying clay or stiff mud that's not too wet
- String or wire
Step 1
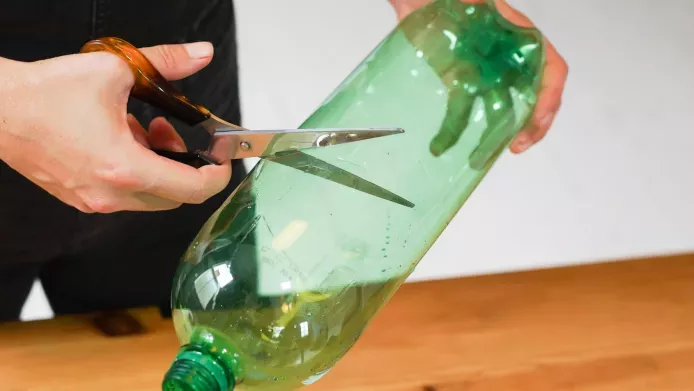
Carefully cut off the top of the container 18 cm from its base and discard the top.
Step 2
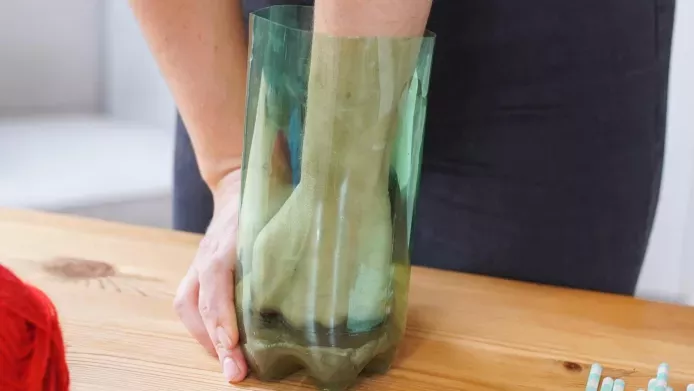
Place a ball of clay/mud inside at the base and push down firmly to secure.
Step 3
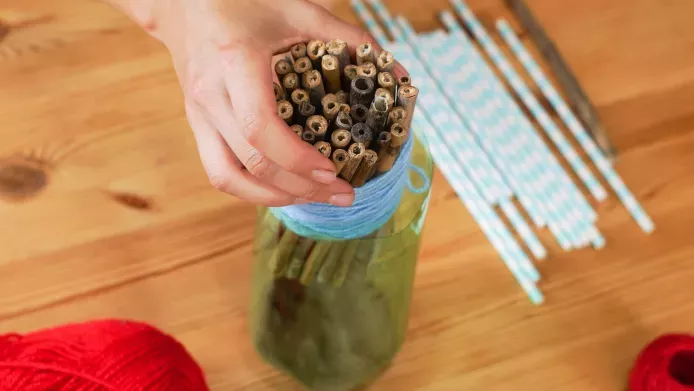
Fill the inside space with hollow tubes.
Step 4
Push the tubes firmly into the clay/mud.
Step 5
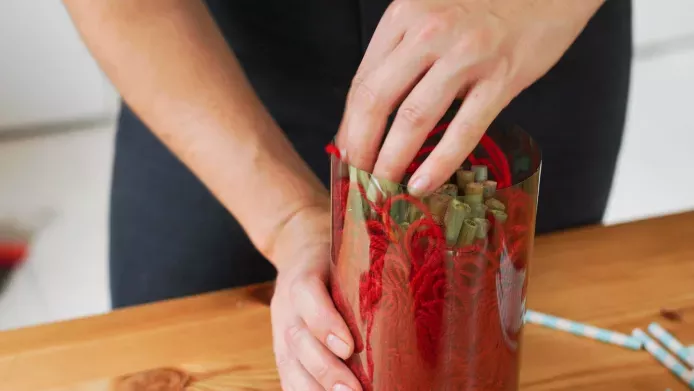
Line the container with your warm fabric, packing the tubes in as tightly as possible so they're firmly held in place.
Step 6
Use string or wire to hang up your bee house on a sunny south-facing wall, fence or post at least one metre above the ground.
Weather warning
If the winter is colder than –5 degrees, take down your bee house and keep it in a cool, dry place. Don't forget to put it back up in the same position around the middle of February or once the bad weather is over.
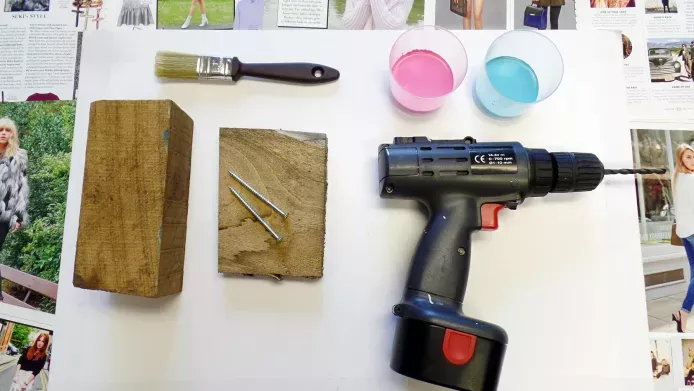
House 2

Safety first:
- As this involves a drill, it's best created by adults. Any young people involved need adult supervision.
- When drilling, always clamp down wood securely, wear safety glasses, tie back long hair and tuck in loose clothing.
Preparation time: 20 minutes
Materials:
- Block/log of untreated, seasoned wood approximately 15 cm (deep) x 10 cm (wide) x 15 cm (high)
- Flat piece of wood for the roof approximately 20 cm x 15 cm x 1.5 cm
- Drill
- Clamp
- Safety glasses
- Drill bits 6–10 mm diameter
- Screws
- String or wire
- Non-toxic paint/oil pastels for decorating
Step 1
Clamp the block of wood securely.
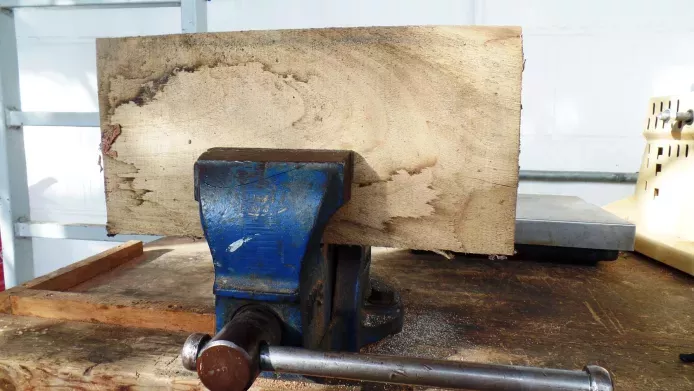
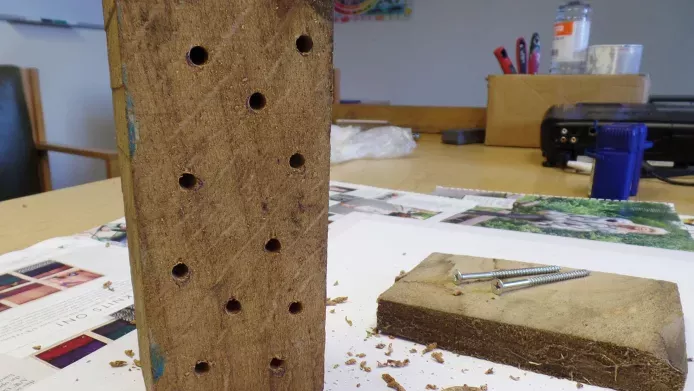
Step 2
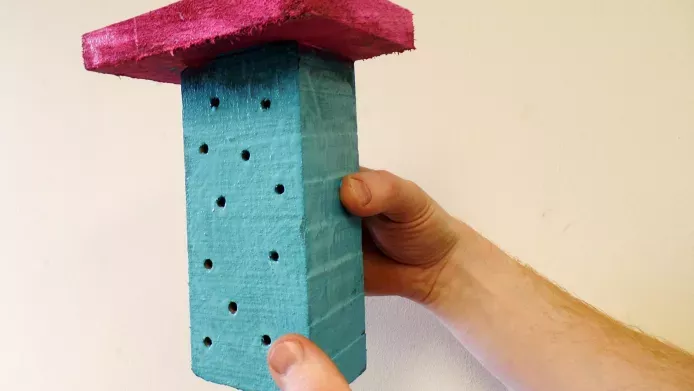
Drill holes in one side of the block. Make the holes as deep as possible but do not come through to the other side of the wood.
Step 3
Place the flat roof piece of wood onto the top surface of the block. Make sure it hangs over the entrances to the holes to protect them from the rain.
Step 4
Make sure the roof piece does not overhang the block at the back so it can sit flat against a wall.
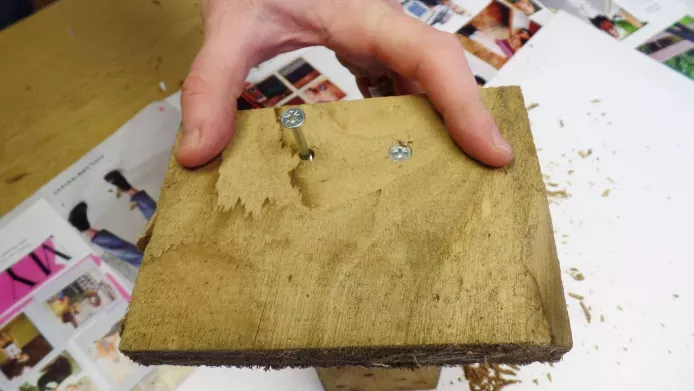
Step 5
Using two screws, firmly attach the roof piece to the top of the block of wood. Pre-drill the holes to prevent the wood from splitting.
Step 6
Screw two screws to the back of the block, leave them protruding out a bit so that you can attach wire/string to hang up your bee house.
Step 7
Decorate the wood using bright colours to attract the bees.
Step 8
Attach your bee house securely on a sunny south facing wall, fence or post at least one metre above the ground.
This bee house will last for many years and doesn't need to be moved in cold weather.
Tips for hanging your bee house
- Bees don’t like a house that is too shady, wobbles or is in a windy spot.
- If you see spider webs inside the bee house, the location is too dark.
What to look out for
- You will know that bees are living in your house when you see the tubes filled up with mud, leaves or bits of fluff – different species of solitary bees use different types of materials.
- When you see a tube filled up at the end it means that the tube is filled with a line of six to ten baby bees that will emerge next spring. Just think of all the plants they will pollinate; the fruit and vegetables that will grow thanks to their (and your) hard work.
Find out more about solitary bees and the amazing ecosystem services they provide.
More ways to help bees
- Decorate your bee house as brightly as possible.
- Sow your Grow Wild seeds nearby.
- Leave a bowl of water near the bee house, or even better, create a pond.
Check out our video
Interactive instructions to help you make a solitary bee house.